
The best under-sink organization system keeps plumbing visible, separates cleaning products from everyday supplies, and makes leaks easy to spot. Empty the cabinet first, remove anything that should not be stored there, then rebuild the space around pipes and shutoff valves instead of hiding them.
TL;DR: Clear the cabinet completely, inspect for leaks, group supplies by use, store chemicals safely in original containers, use removable bins or shallow drawers around plumbing, and leave enough open space to see the cabinet floor.
Empty Everything and Inspect the Cabinet
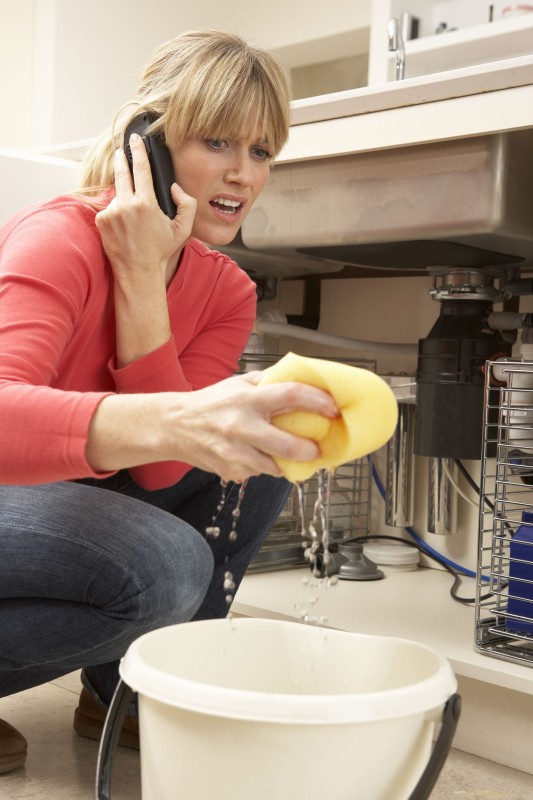
Take every item out and wipe the cabinet floor and sidewalls. Look closely around the drain trap, supply lines, disposal connections, dishwasher hose, and shutoff valves. Swollen particleboard, staining, peeling liner, dampness, or a musty smell can indicate a leak or past moisture problem.
Organization should not cover an active plumbing issue. If the cabinet is wet, correct the source and dry the area before adding bins or liners. A waterproof tray can help contain a minor drip long enough to notice it, but it is not a substitute for repair.
This same visibility-first idea applies elsewhere in the home. If storage is becoming difficult because fixed shelves hide the back of a cabinet, the guide to adding pull-out storage without replacing cabinets explores a more permanent upgrade.
Decide What Actually Belongs Under the Sink
The cabinet is convenient for dish soap, dishwasher supplies, sponges, trash bags, and a small set of cleaning products, but it is not automatically the right place for every household chemical. Avoid storing food, pet food, medication, paper goods that can absorb leaks, or valuable items there.
Households with children or pets should be especially cautious with cleaners, detergent packets, drain products, and pesticides. Keep hazardous products in their original labeled containers and follow label storage directions. epa’s safer choice program can help shoppers identify products formulated with ingredients that meet the program’s safety criteria, but safer ingredients do not mean a product should be left within a child’s reach.
If the cabinet cannot be secured appropriately, move hazardous products to a higher or locked location rather than trying to solve the risk with prettier bins.
Sort by Task Instead of Bottle Shape
Group items according to how you use them. One bin might hold dishwashing supplies, another general cleaning products, and a third extra sponges or gloves. This prevents the cabinet from becoming a random row of bottles where the least-used product blocks the one you reach for every day.
Keep the most frequently used category near the front. Place backup supplies farther back only if you can still see the plumbing. If you buy large refill containers, consider storing bulk backups elsewhere and keeping only the working-size container under the sink.
A small label on the front of an opaque bin can help, but clear bins reduce the need for labels and make it easier to see spills. The goal is not visual perfection; it is fast retrieval and fast problem detection.
Work Around Pipes With Zones
Under-sink cabinets have awkward vertical interruptions, so a single large shelf often wastes space. Instead, create zones: a low bin on one side of the drain trap, a narrow caddy on the other, and a shallow organizer near the door for small items. Tension rods are sometimes suggested for spray bottles, but only use one if the cabinet structure supports it and it does not interfere with plumbing.
Measure the clear width, depth, and height on both sides of the pipes before buying organizers. Check door hinges and the swing path of any pull-out container. A bin that fits the opening may still collide with the disposal or shutoff when slid inward.

Use the Door Carefully
The inside of the cabinet door can hold light items such as gloves, cleaning cloths, or a small caddy, but added weight can strain hinges. Use door-mounted storage only when the hardware is compatible with the door thickness and material. Keep containers shallow enough to clear interior pipes and bins when the door closes.
Avoid hanging heavy bottles from adhesive hooks unless the adhesive is specifically rated for the surface, load, humidity, and temperature conditions. A falling chemical bottle can leak, crack, or damage the cabinet. Screw-mounted accessories may be stronger, but check door thickness before drilling so fasteners do not penetrate the front face.
Keep Chemical Safety Separate From Organization
Never combine cleaners in an unmarked container to save space. Different products can react dangerously. Poison control’s guidance on chlorine gas from household chemicals warns against mixing bleach with acids or ammonia. Organization should make safe use easier by keeping original labels readable and incompatible products distinct.
Store spray nozzles closed or locked if the product provides that feature. Wipe residue from bottle exteriors before returning them to a bin. If a container is leaking, follow the product label for cleanup and disposal rather than transferring the contents casually.
This is one place where minimalism is genuinely useful: fewer products mean fewer opportunities for spills, forgotten duplicates, and unsafe mixing.
Make Leak Detection Part of the Setup
Leave a visible strip of cabinet floor around the plumbing if possible. A light-colored removable tray or liner can make new drips easier to notice. Do not permanently seal over damaged material or cover persistent moisture with decorative paper.
Once a month, pull the front bin out and run a dry paper towel around accessible plumbing joints. You are not diagnosing plumbing; you are checking for moisture that deserves attention. Also look for corrosion on metal shutoff valves and supply connectors.
If you store a small water sensor under the sink, place it where a leak would reach it without blocking access to valves. Test its battery or notification function according to the manufacturer instructions.
Prevent the Cabinet From Refilling Itself
An organized cabinet tends to fail when every new cleaning product is added without removing an old one. Use a simple one-in, one-out rule for duplicate products. Keep a small “use first” area for nearly empty bottles so they do not disappear behind new purchases.
When seasonal cleaning ends, return only products you actually use. Specialty cleaners that are rarely needed can often live in a dedicated utility-storage area if their labels allow it. Keeping the under-sink cabinet focused on kitchen tasks makes it easier to maintain.
For a broader visual reset in a compact room, small-space decorating mistakes covers how too many objects, undersized storage pieces, and blocked visual lines can make limited square footage harder to use.
A Cabinet That Stays Practical
The most successful under-sink setup is easy to undo. Removable bins, trays, and caddies let you reach plumbing quickly, clean spills, and change the layout when products or household needs change. Avoid permanent organizers that trap moisture or make valves inaccessible.
After you finish, close the doors and reopen them as if you were in a hurry. Can you reach dish soap without moving three bins? Can you see the shutoff valves? Would a leak show up quickly? If the answer is yes, the cabinet is doing its job.
Home and garden content is for informational and educational purposes only. It does not replace plumbing, chemical-safety, pest-control, structural, electrical, or legal advice. Always follow product labels and professional guidance.
Do a ten-minute reset every few weeks: remove empties, wipe the tray, check for moisture, and put wandering items back into their assigned zone.